
Before you start
- Use a Shopify account with permission to develop apps and install them on the target store.
- The app and target store must belong to the same Shopify organization. Install the app on the target store first.
- Find the store’s
*.myshopify.comdomain under Settings → Domains in Shopify admin. Enter the store domain, without a custom storefront domain or admin URL path. See Shopify’s domain guide.
This connection form uses Client ID and Client Secret. Apps created in the Dev Dashboard do not display a copyable Access Token in Shopify admin. Do not enter a legacy Admin API Access Token in either field. See Shopify’s official explanation.
Get app credentials
1. Create or open an app
In Shopify admin, go to Settings → Apps → Develop apps → Build apps in Dev Dashboard, or sign in directly to the Shopify Dev Dashboard. Open an existing app under Apps. To create one, click Create app → Start from Dev Dashboard, enter a name, and create the app.2. Configure permissions and release a version
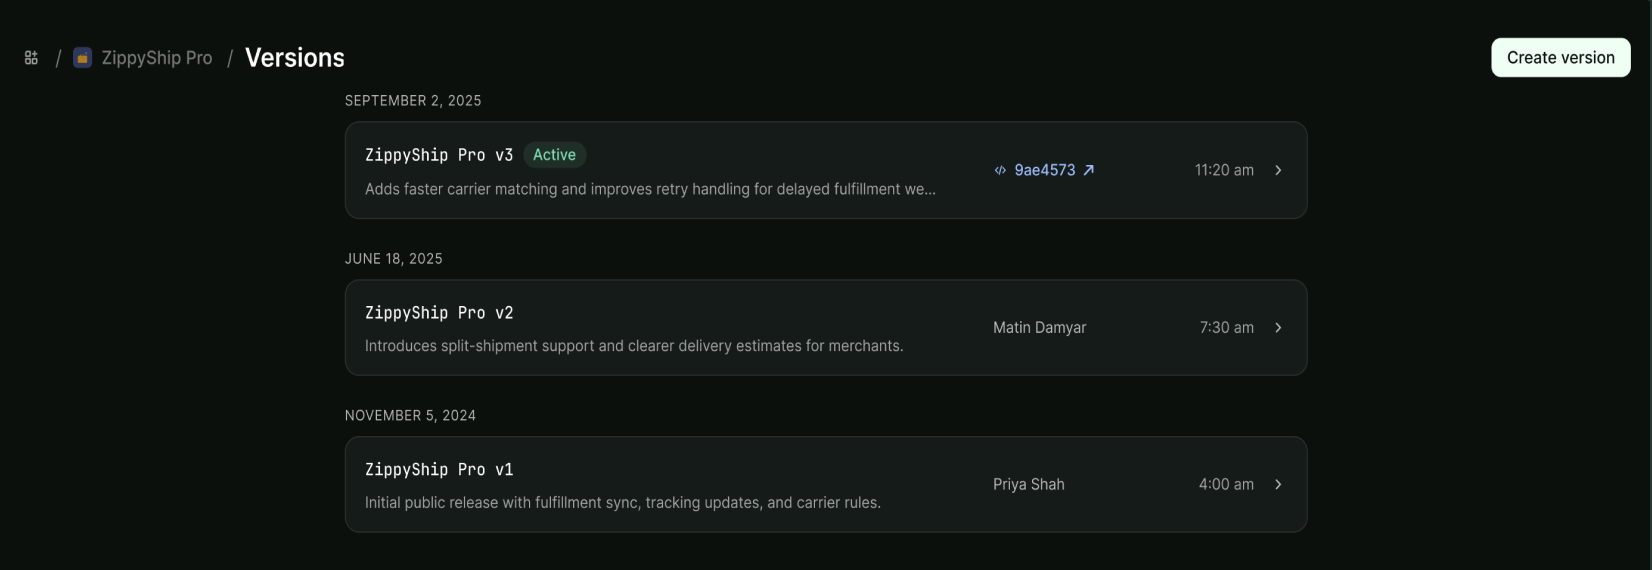
On the app’s Versions page, configure App URL, Webhooks API version, and Scopes as needed, then click Release. An app needs at least one released version before you can install it. For an app that is not embedded in Shopify admin, Shopify’s guide provides the default App URLhttps://shopify.dev/apps/default-app-home. Select read permissions for the data you need. Protected customer data or other sensitive data may require additional approval. See Shopify’s official app creation guide for configuration details.
3. Install the app on the target store
Click Install app in the app’s Installs section, select the target store in the same organization, review permissions, and click Install. Creating the app or copying its credentials alone does not install it. If you later change scopes, release a new version and approve the additional permissions in Shopify admin. See Shopify’s app installation guide.4. Copy the Client ID and Client Secret
In the Dev Dashboard, open Apps → your app → Settings → Credentials. Copy the Client ID and Client Secret from the same app.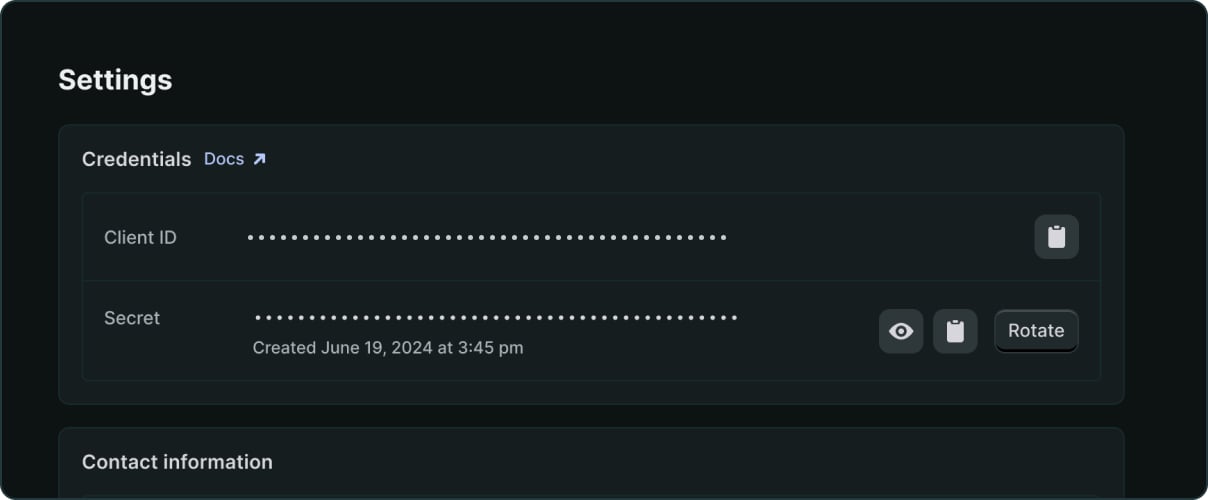
Connect in Hologrow
- Sign in to Hologrow, open Business accounts, find Shopify in the platform list, and click Connect.
-
Enter the Store domain in the format
your-store.myshopify.com. -
Paste the Client ID and Client Secret, and optionally add a Note.
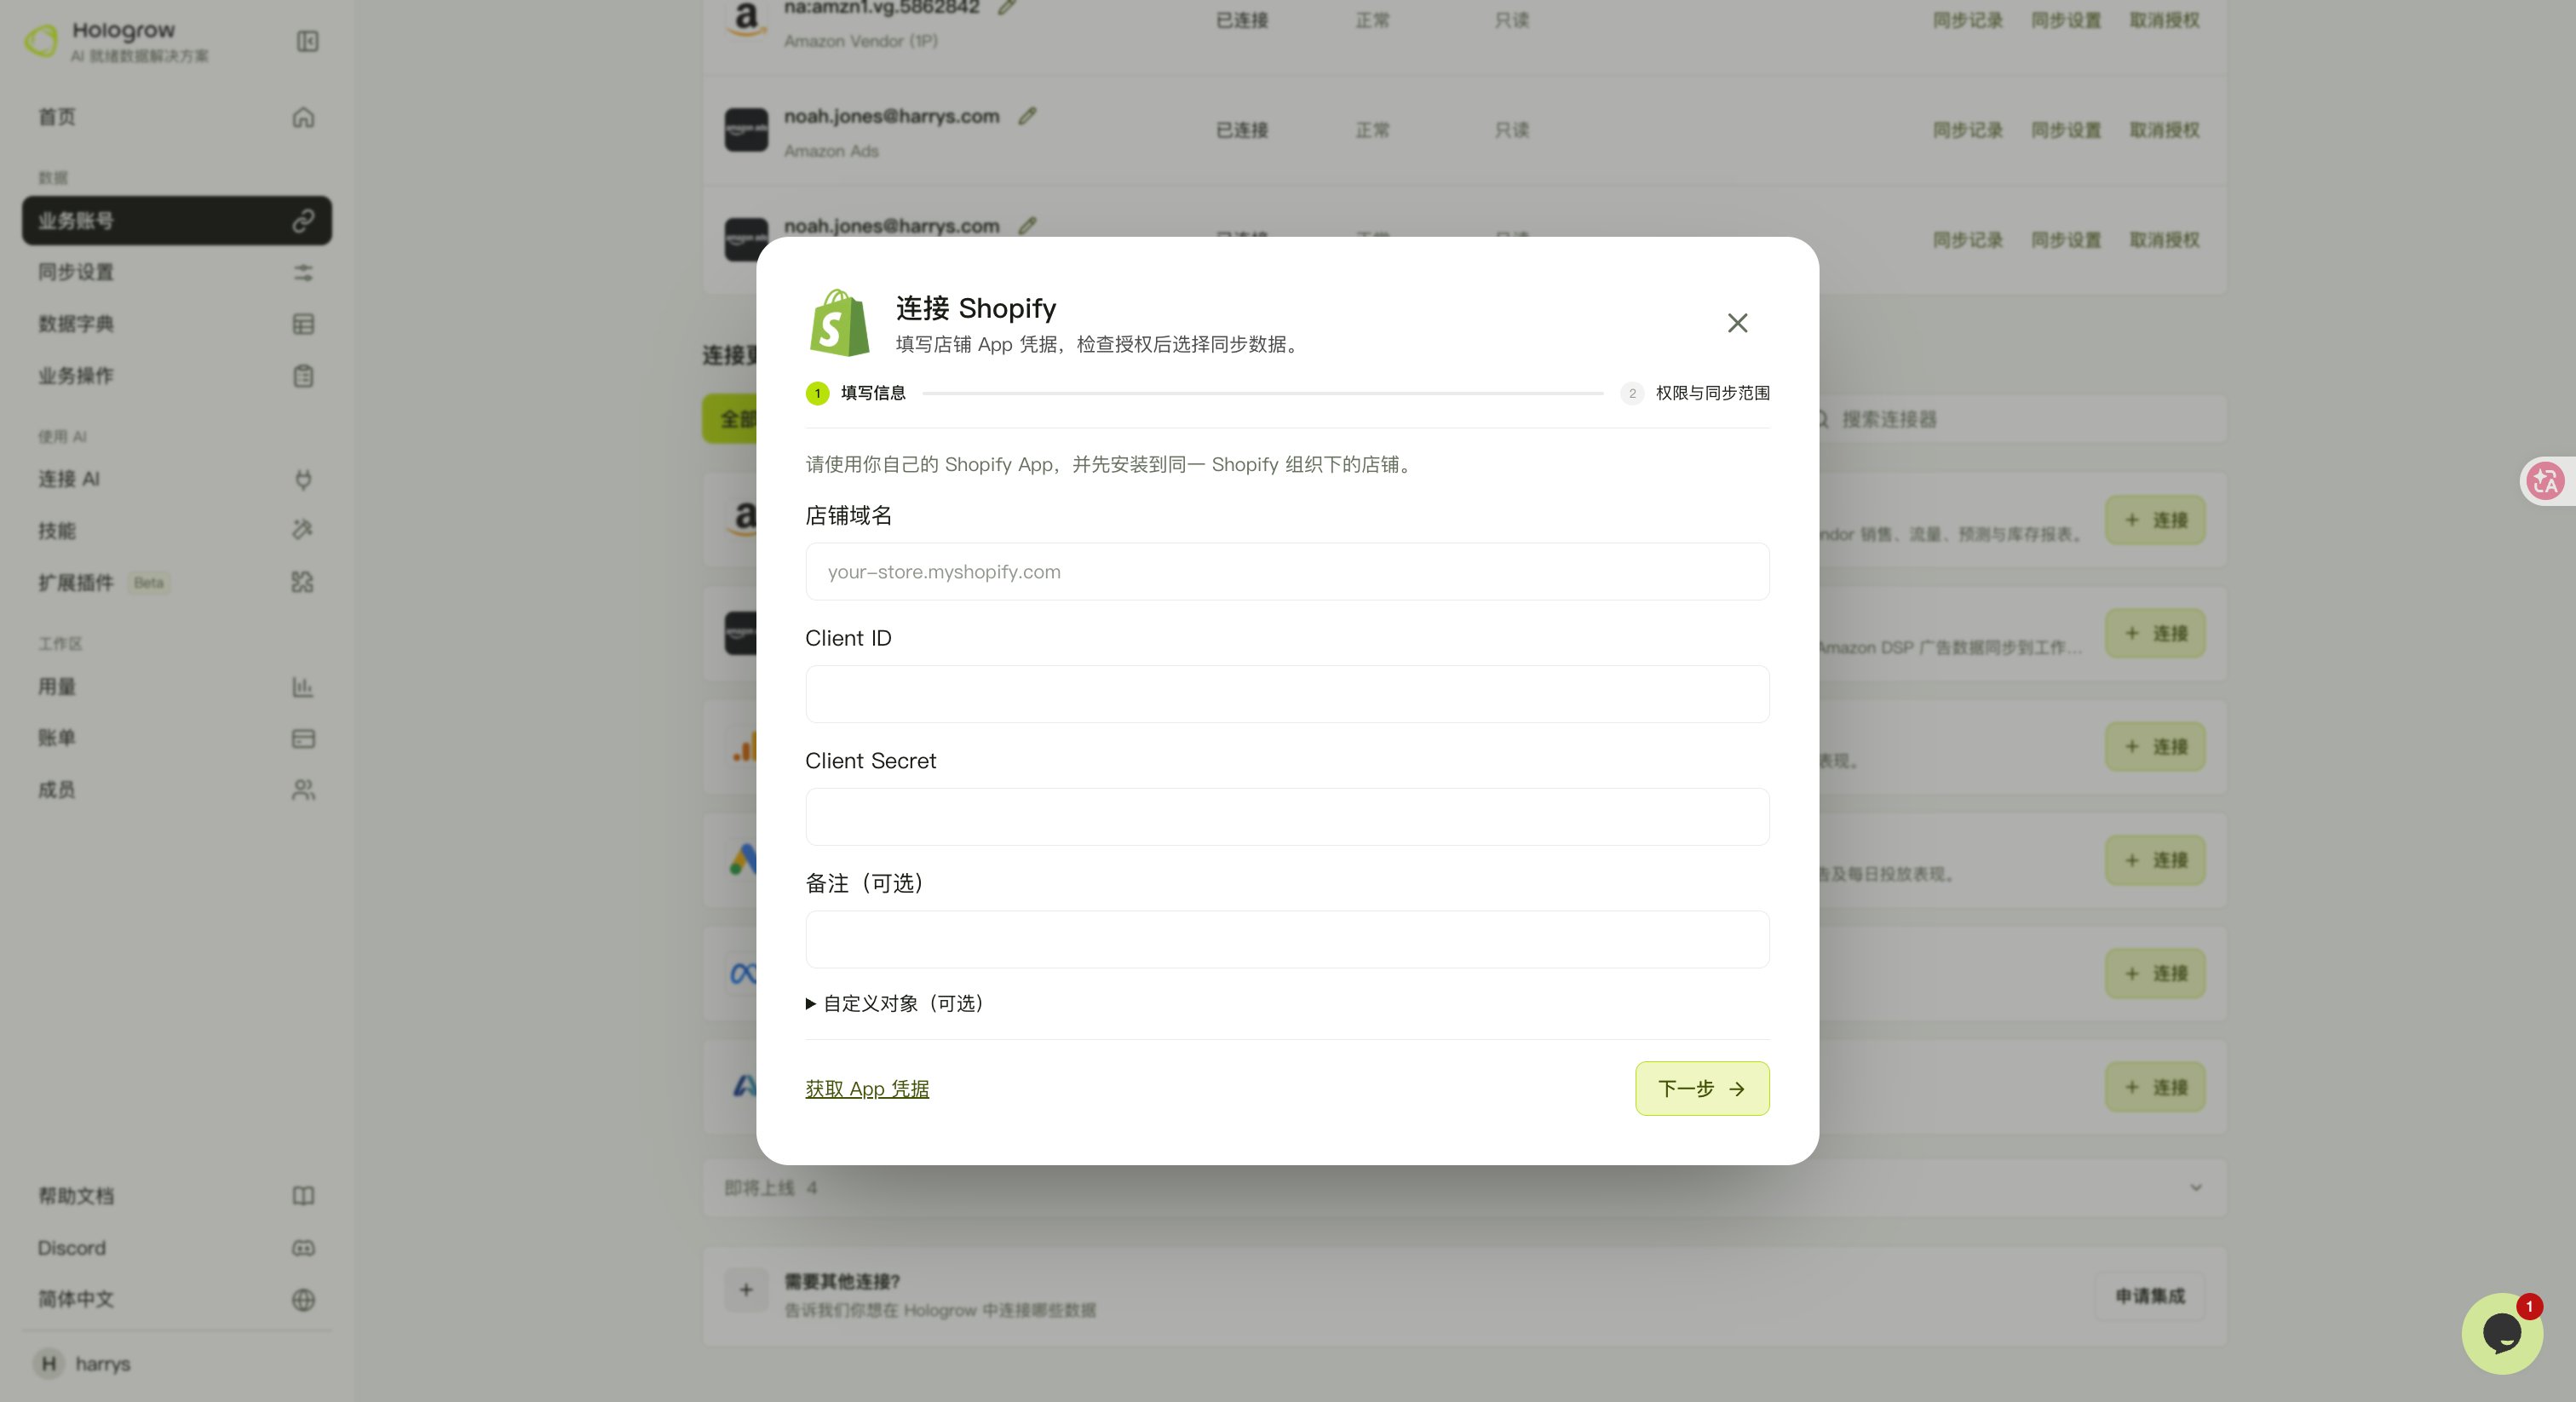
- Click Next, review authorization in the Permissions and sync scope step, select the data to sync, and follow the prompts to finish connecting.
- Find the connected Shopify business account, confirm the store and connection status, and open Sync history to check progress. Successful authorization does not mean the historical sync has finished.
Troubleshooting
- App development options are missing: Confirm that your Shopify account has app development permissions. Contact your organization administrator if needed.
- Credential validation fails: Check that the domain belongs to the target store and that both credentials come from the same app without extra spaces. Verify that the app is installed on the store and that both belong to the same organization.
- Permissions or data are missing: Check the app version’s Scopes. After changes, release a new version and approve the additional permissions in Shopify admin. Return to Hologrow to review authorization and sync scope.
- You already have a legacy Access Token: This form requires app credentials. Follow the Dev Dashboard steps above to get the Client ID and Client Secret.
- Multiple stores: Connect each store separately. Install the app on each target store and ensure that the same-organization requirement is met.